Guide · Step 1 of 2
Give Us Access to Your Lovable Project
Invite Lovable 2 Live to your Lovable workspace so we can review your project and start the analysis. It takes less than a minute.
Step by step
- 1
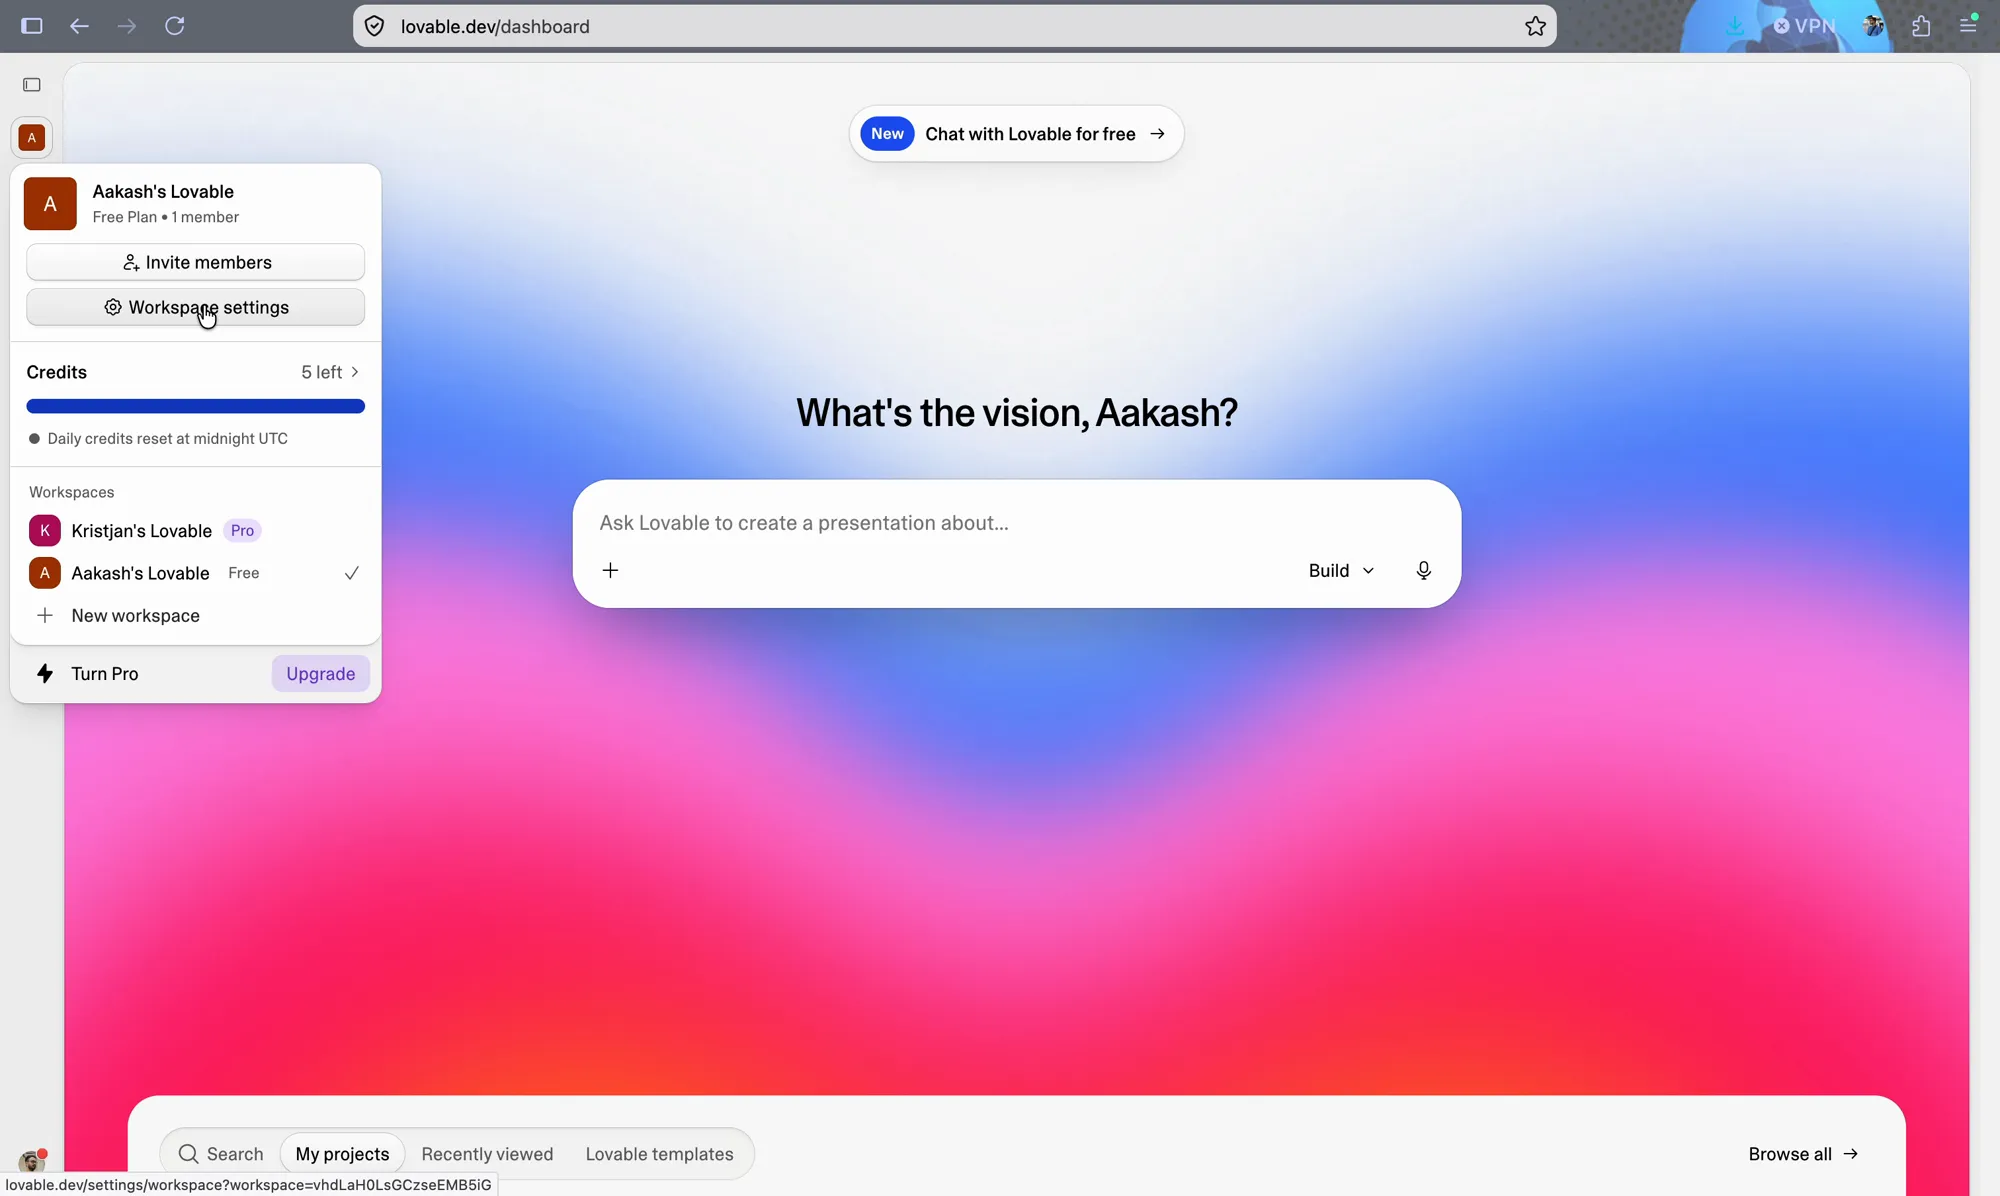
Open Workspace settings
On your Lovable dashboard, click your workspace avatar at the top of the left sidebar. In the menu that opens, click Workspace settings.
- 2
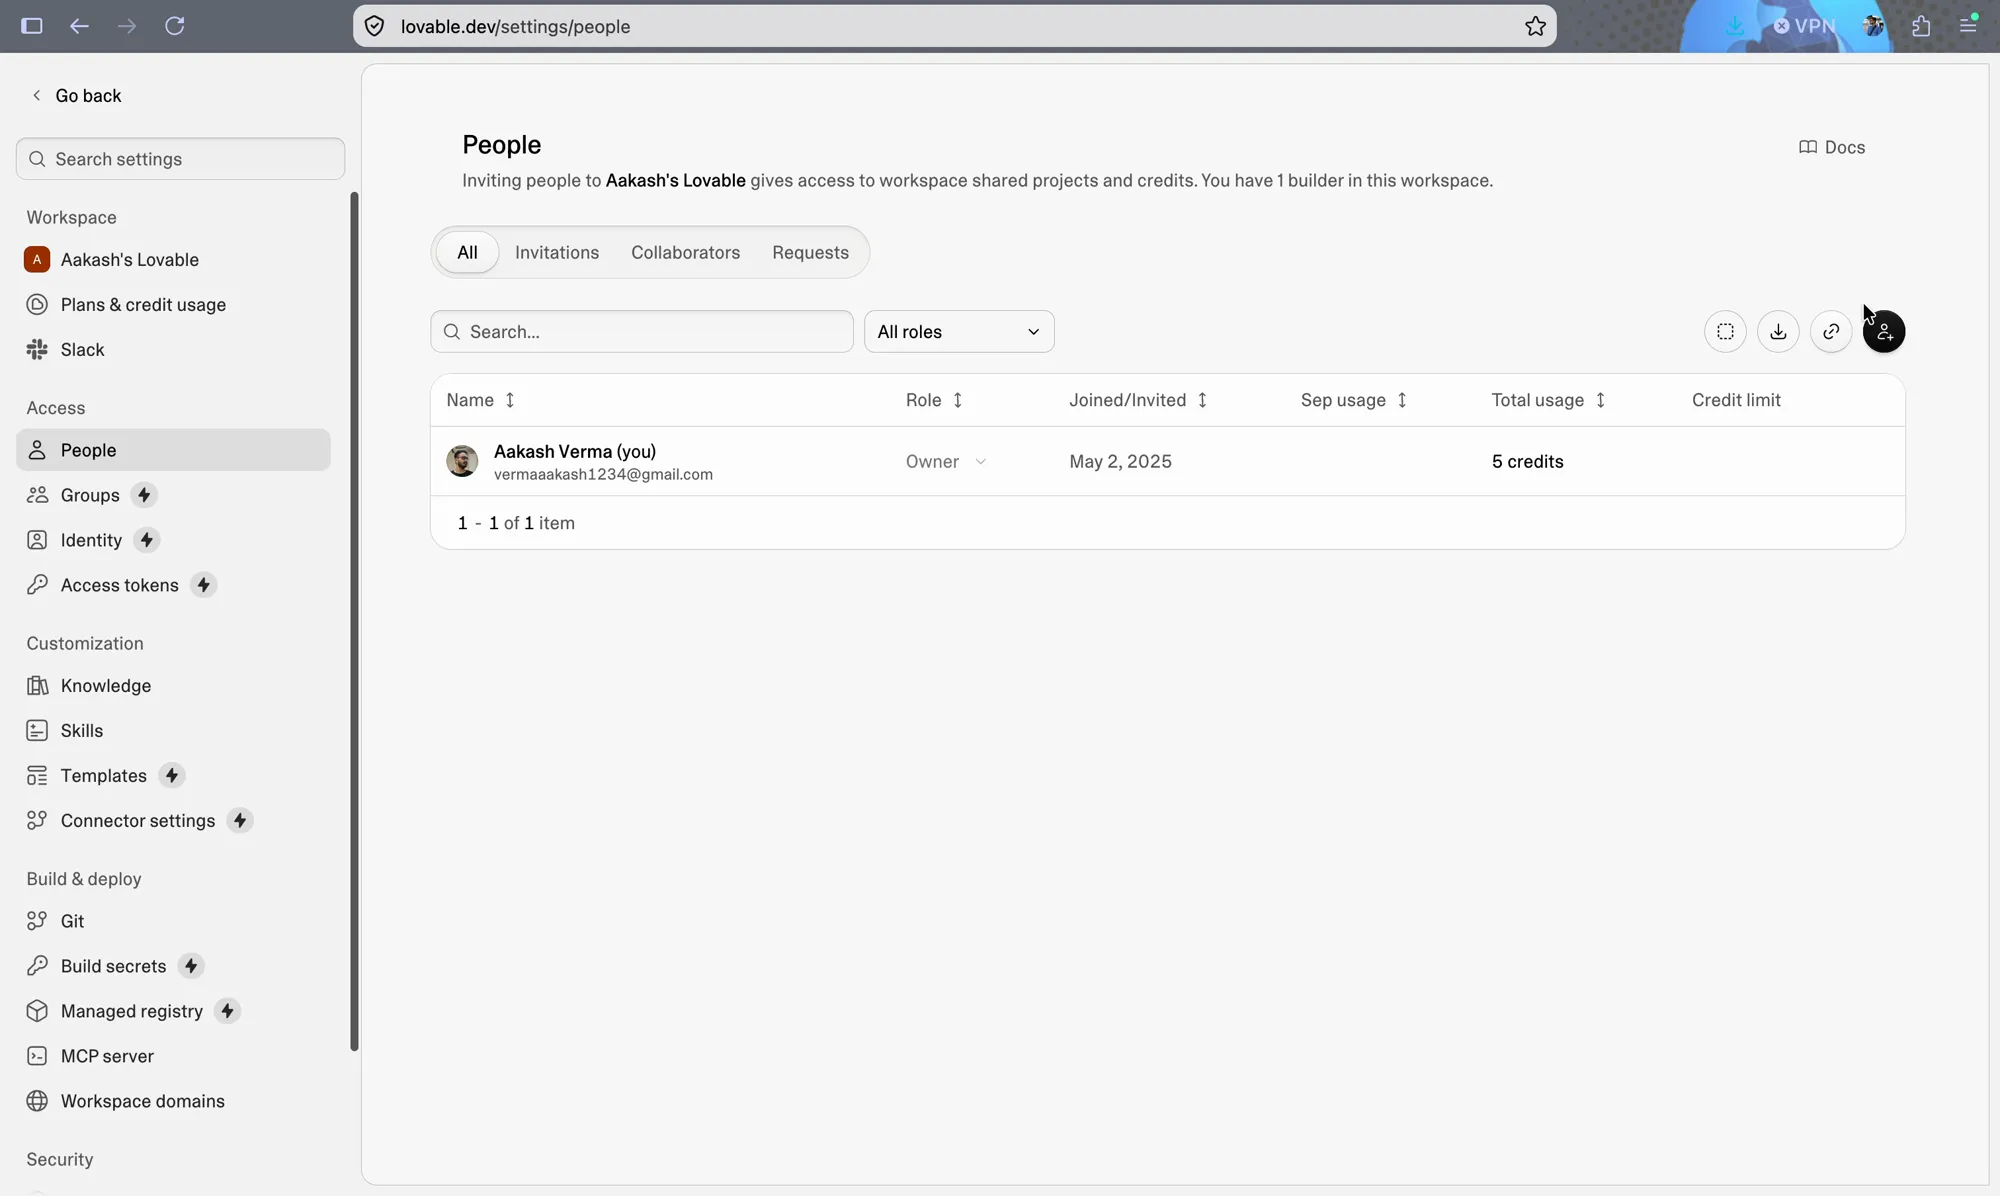
Go to People
In the settings sidebar under Access, click People. Your own account is listed there as Owner. Click the invite icon (person with a plus) at the top right of the table.
- 3
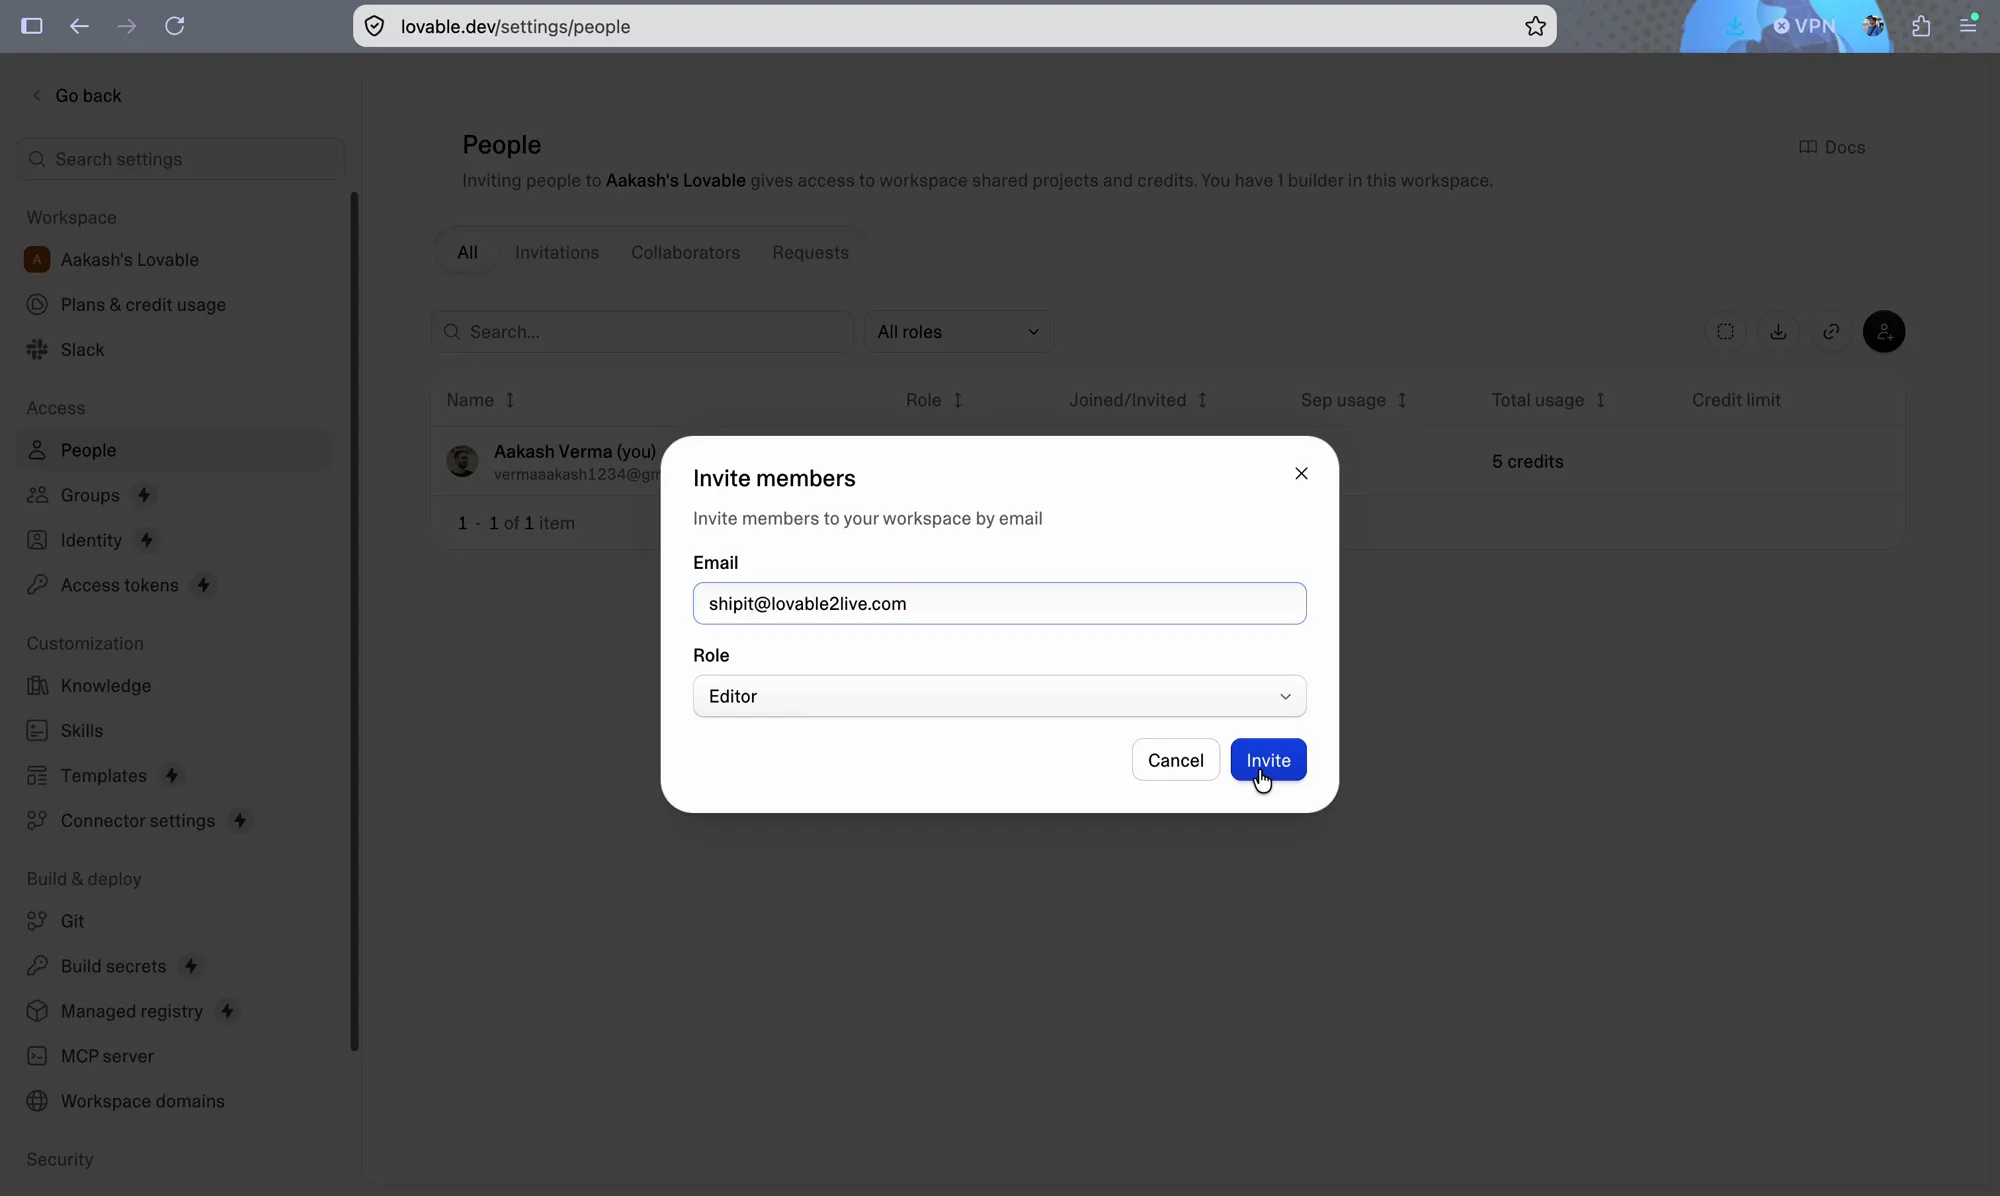
Invite shipit@lovable2live.com as Editor
In the Invite members dialog, enter shipit@lovable2live.com as the email. Leave the role as Editor, then click Invite.
- 4
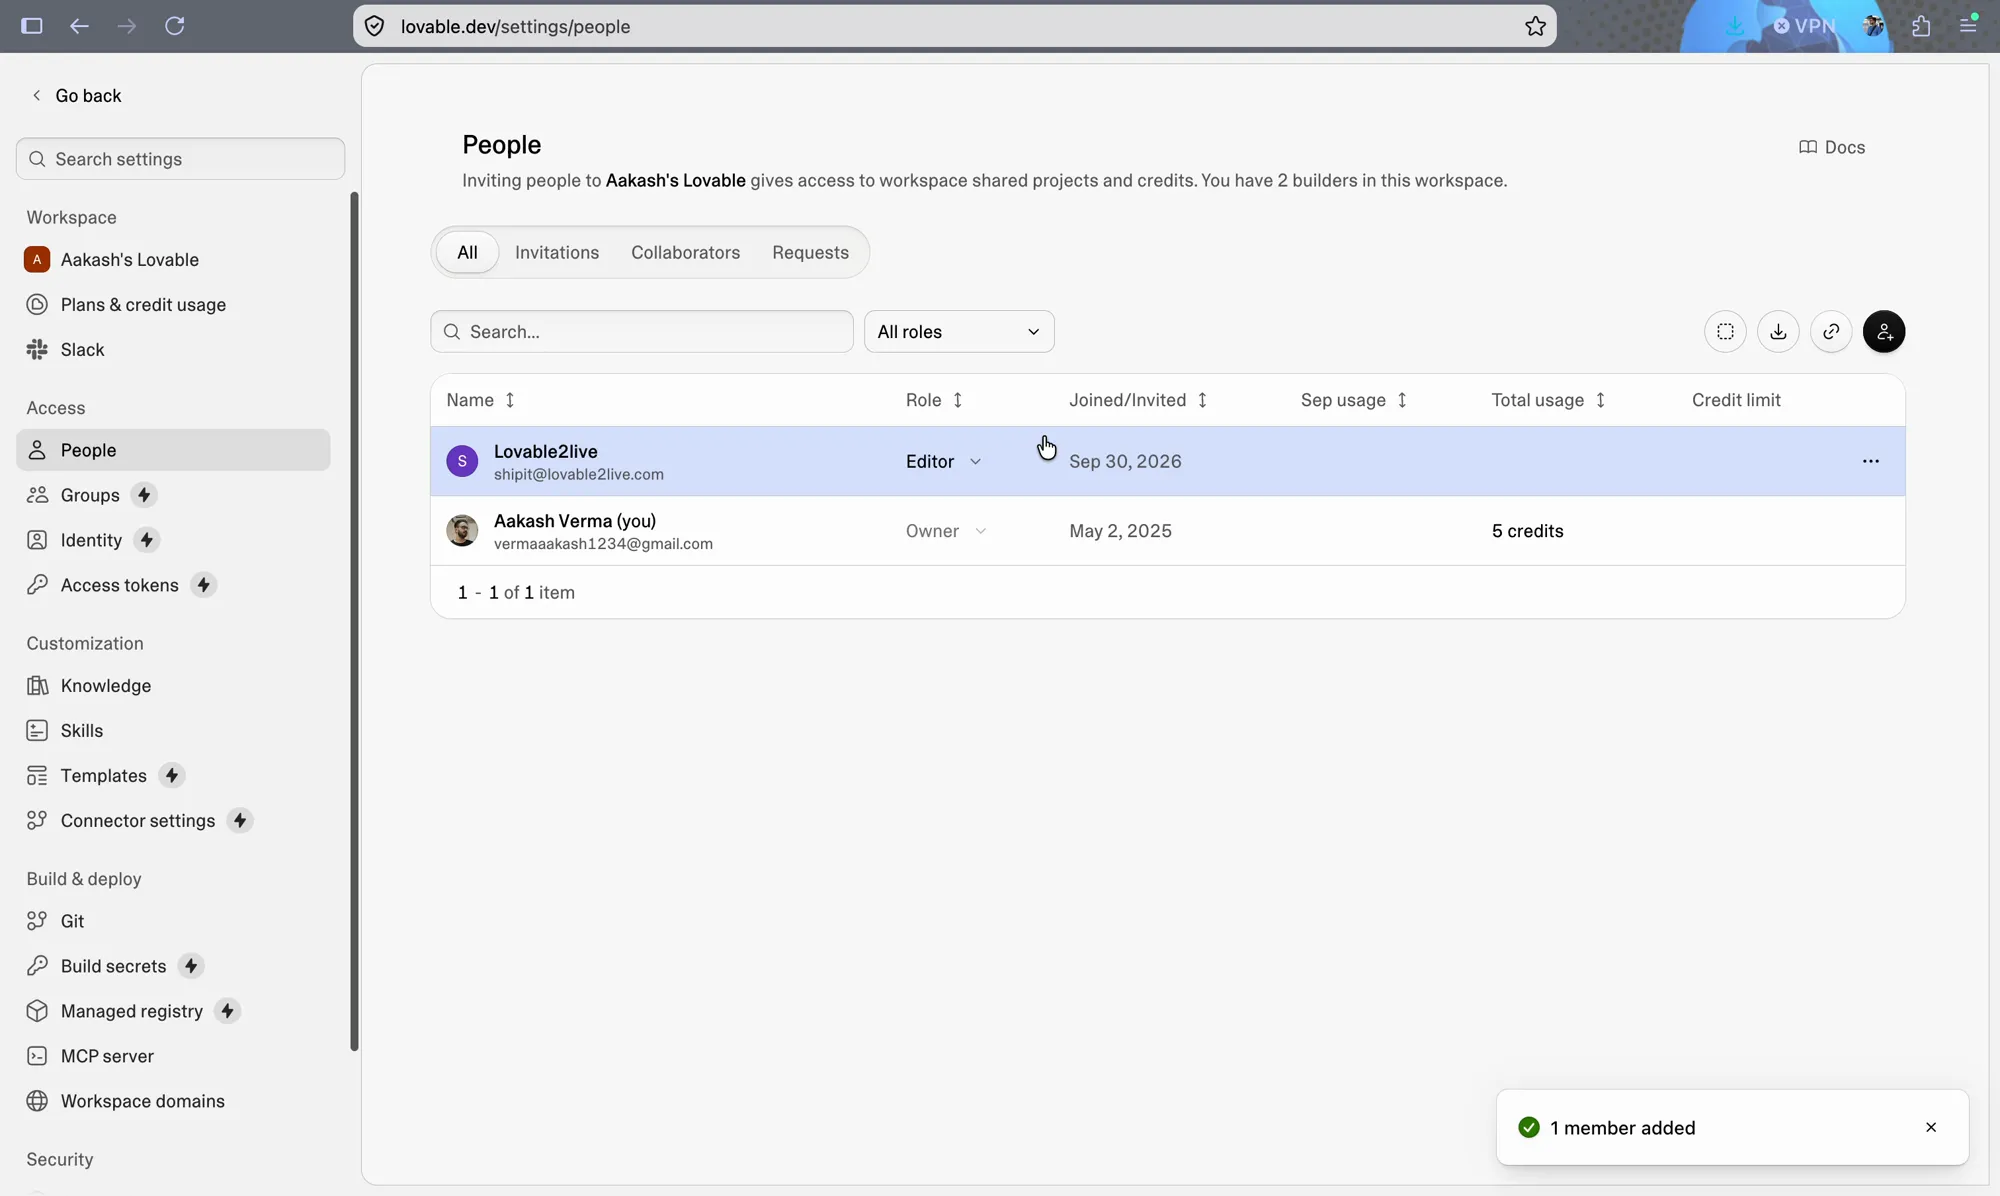
Done
You will see a “1 member added” message and Lovable2live listed as an Editor. We now have access to your project and can start the analysis.
verified_user Good to know
- Invite exactly shipit@lovable2live.com. It is the only address we use for project access.
- Editor is enough. You stay the Owner and can remove us from People at any time.